Mothernode gives users the ability to send emails from within their Customer, Contact, and Lead and Opportunity records. Sending emails from within Mothernode provides advantages including automatic copying of the correspondence to the related Mothernode record, and the ability to use Mothernode email templates with merge fields, which help to save time and personalize the correspondence. NOTE: Standard email templates are independent of Mothernode’s Marketing Automation.
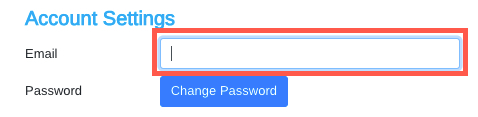
Note: The email address you are sending email from (ie. Outlook and Gmail) must match your email address in your Mothernode company profile in order for Mothernode to validate and post your emails to your CRM records.
In order to send emails from within Mothernode, users will need to configure their SMTP Settings in their user accounts. This process will not only allow users to send emails, but the emails will also include all the user’s reply to information, replicating the experience of sending the email from their main service, like Outlook or Gmail.
Admins also have the ability to set-up user SMTP settings from the user account under Administration, the steps below are similar but apply to the user setting-up their email settings in their My Account function.
IMPORTANT: If you are using port 25 for SMTP settings you must enable ports 465 or 587 on your mail server to allow Mothernode to effectively relay email on your behalf. Port 25 will not work. Mothernode cannot send emails via your mail server using port 25.
Using these settings will instruct Mothernode to use your own email settings instead of the general company email settings (read more about company email settings).
Setting up your SMTP setting in your user account.
* IMPORTANT: You will need to know your email settings to proceed with the following instructions.
- Login to Mothernode
- Access your account profile by clicking User Menu (top right) > My Account
- Click the SMTP Settings tab
- Click the ‘Email account for…’ selection to specify that you will use your own email account settings
- Add your account settings in the corresponding fields
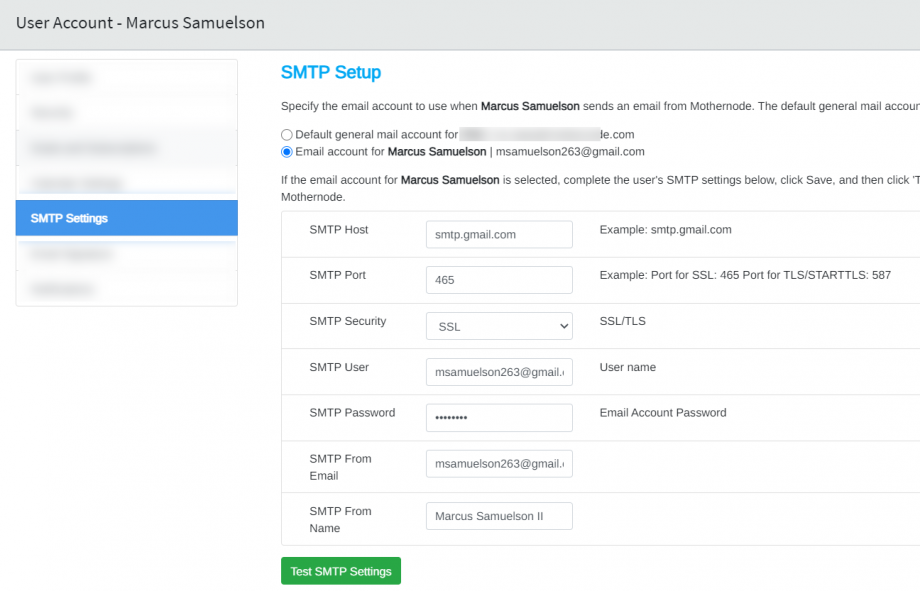
After adding the information, click the SAVE and then TEST SMTP SETTINGS. The test results will appear in a light window. For assistance with your email account and settings, contact your email administrator.
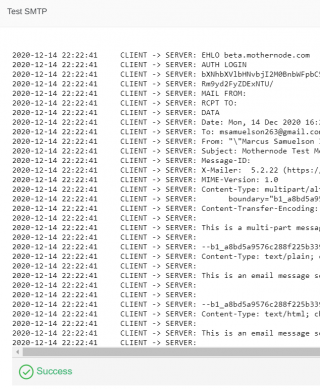
The above image is an example of a successful SMTP test, indicating that email will now be successfully sent from Mothernode. if the SMTP From Email and SMTP From Name fields are set up per the above instructions, then your email recipients will see your name and email address in the email.
Troubleshooting Gmail Issues
If the TEST SMTP SETTINGS function produces an error, then a setting in your email account may need to be adjusted. Please view the article Fix Mothernode Email Sending Issues and consult with your email administrator for assistance.
The following may also prevent your email settings from working in Mothernode:
- If you’ve turned on 2-Step Verification for your account, you might need to enter an App password instead of your regular password.
- Sign in to your account from the web version of Gmail at https://mail.google.com. Once you’re signed in, try signing in to the mail app again.
- Visit http://www.google.com/accounts/DisplayUnlockCaptcha and sign in with your Gmail username and password. If asked, enter the letters in the distorted picture.
- Your app might not support the latest security standards. Try changing a few settings to allow less secure apps access to your account.
- Make sure your mail app isn’t set to check for new email too often. If your mail app checks for new messages more than once every 10 minutes, the app’s access to your account could be blocked.
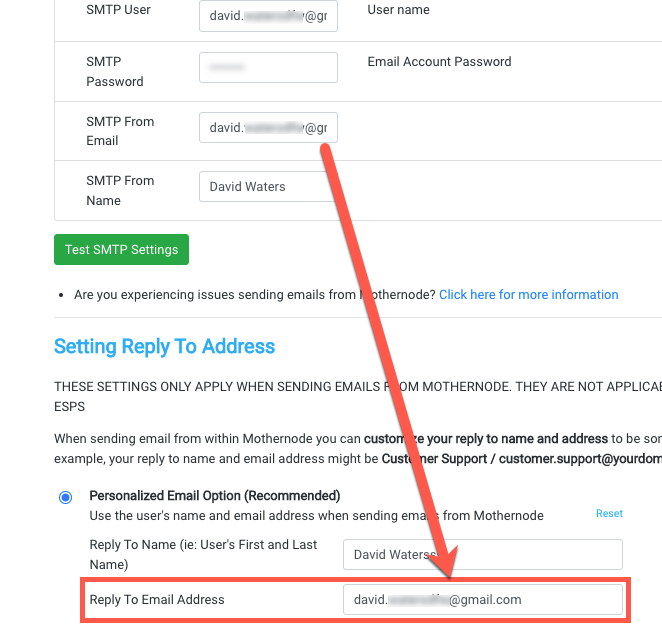
- Be sure that the reply to information in the email below your settings matches your email settings. This is necessary when sending from your address.