
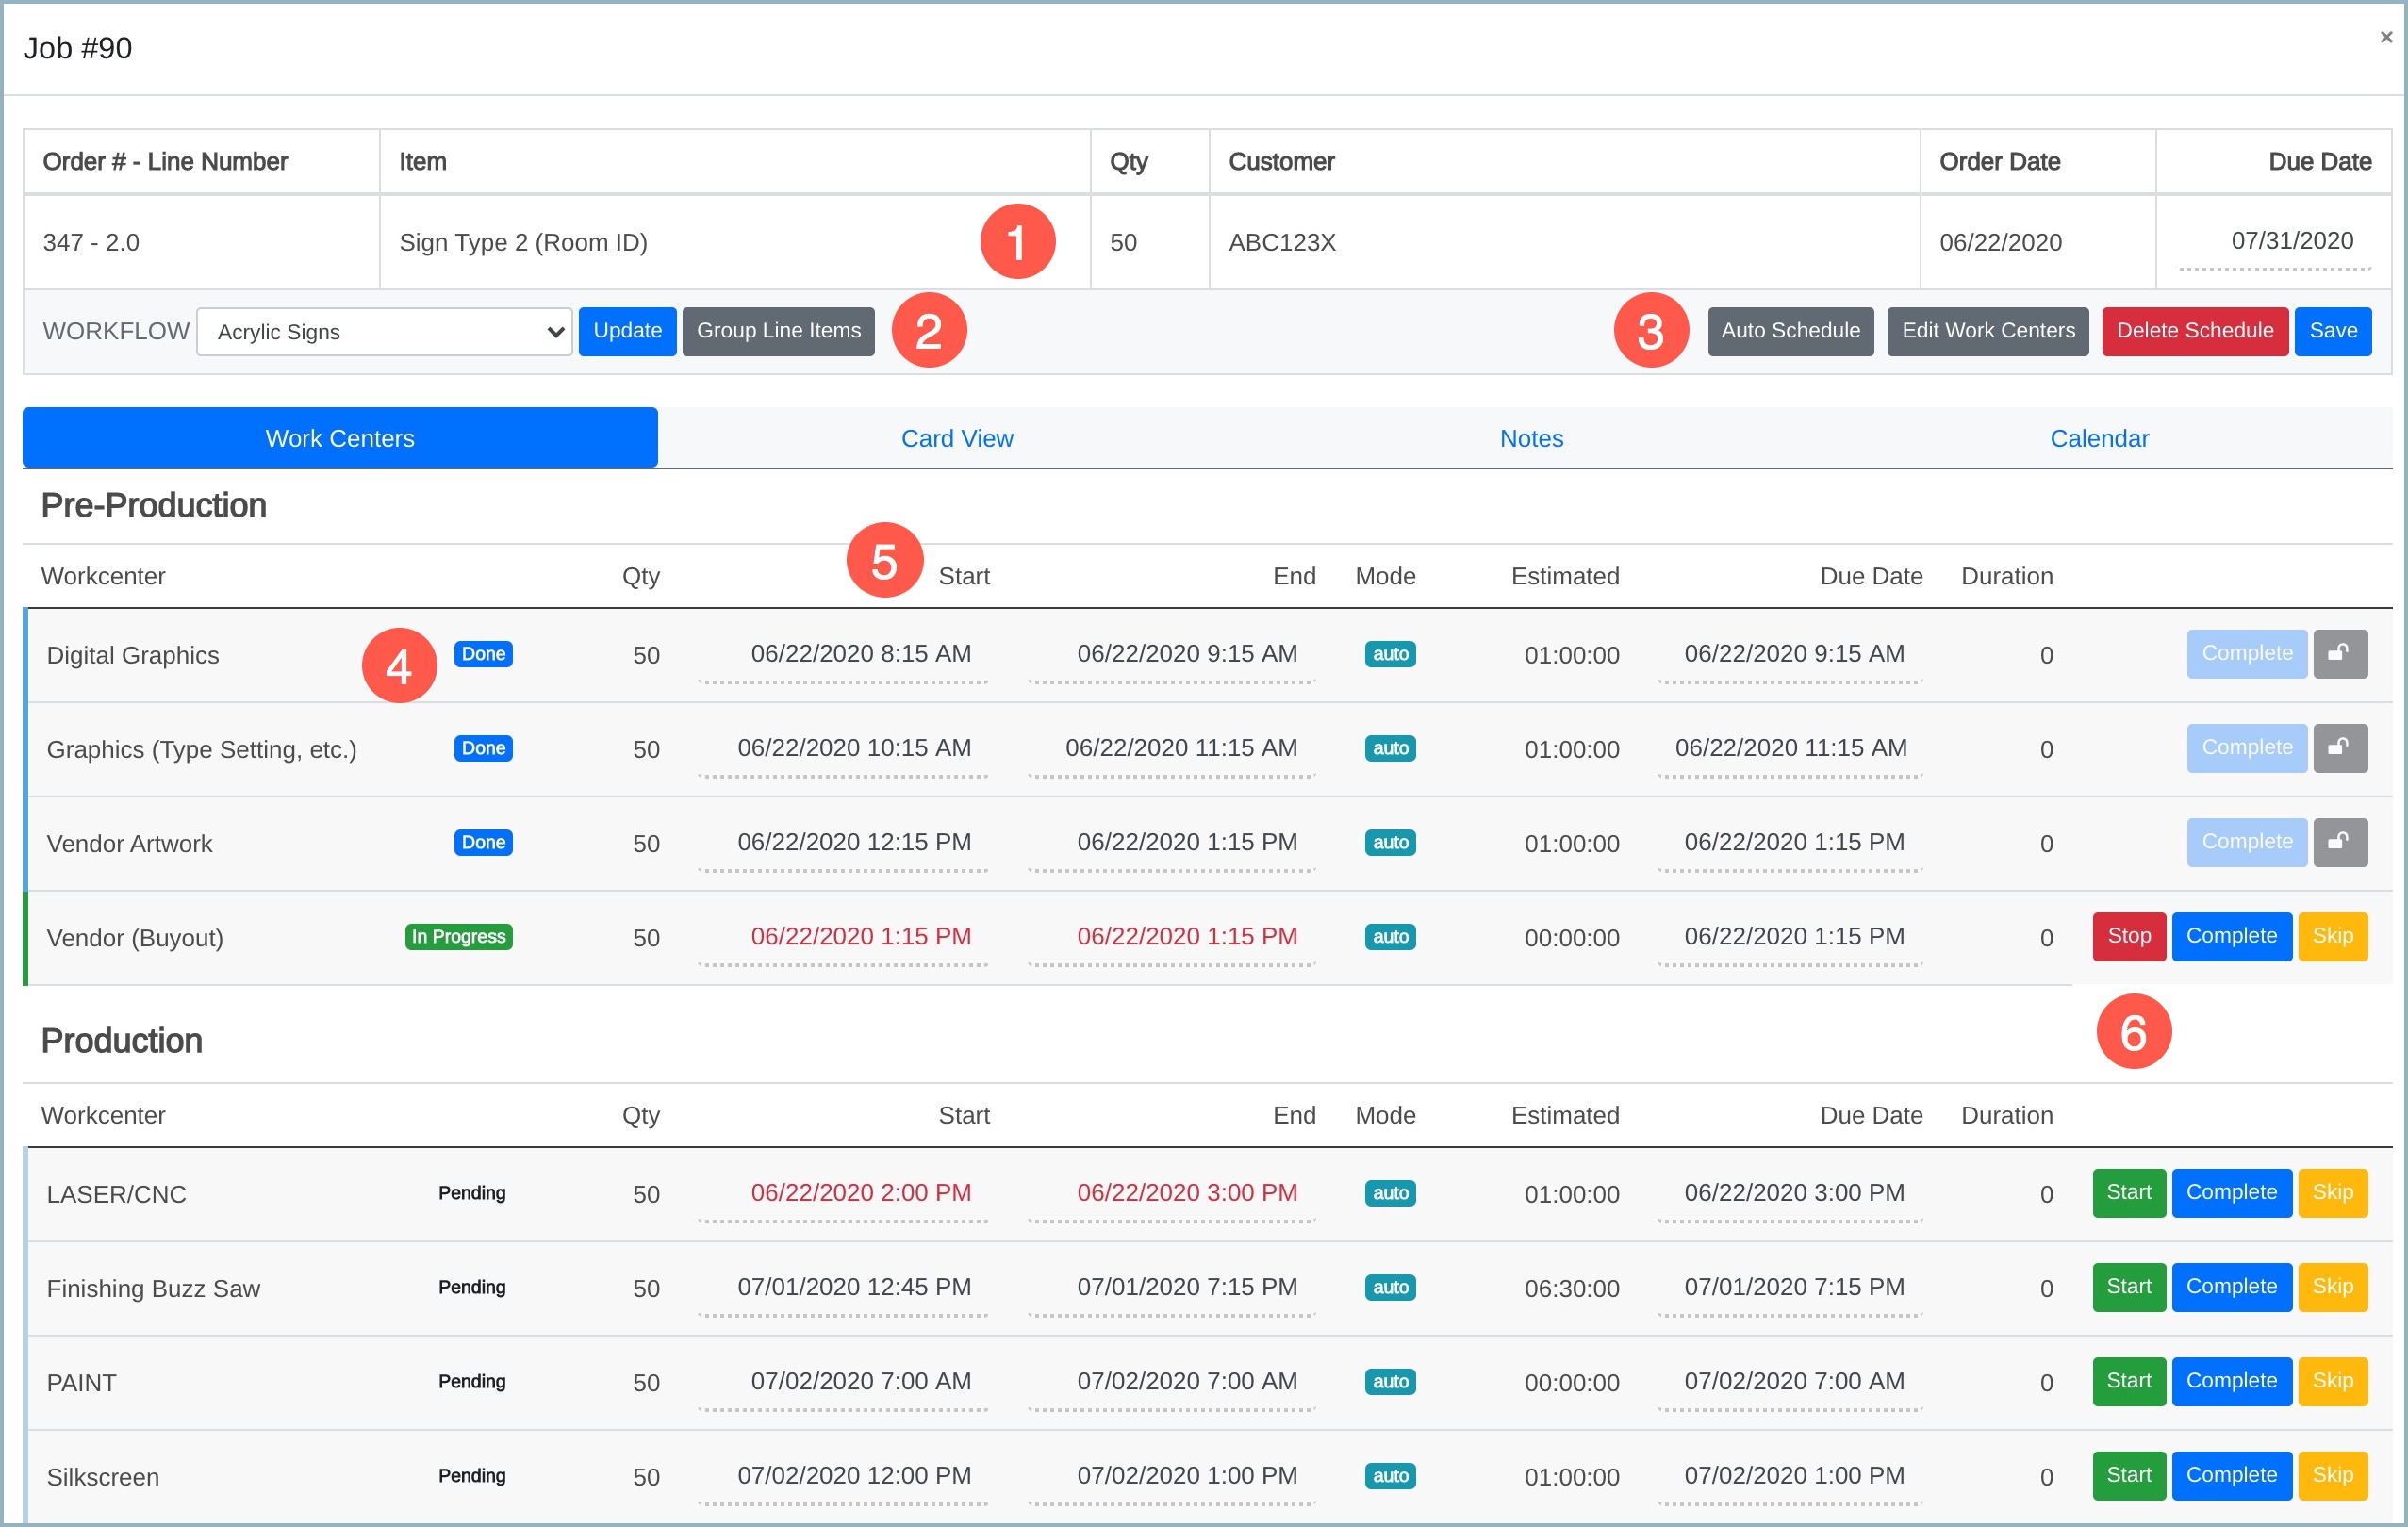
Mothernode Job cards are used to schedule and manage various jobs within an order. Each line item gets its own Job Card for scheduling and managing. For practical purposes, you can combine line items that will go through the same workflow, using the Groupings option. See grouping items for production details.
Job Cards can be accessed from anywhere you can schedule a job or access job data. This includes Production Orders, Scheduling screens, and the Production Dashboard.
The primary function of the Job Card is to auto-schedule jobs based on their workflow. In order to schedule a job, the following criteria must apply:
- You must have an order with at least one item (you cannot schedule service items)
- Your Production Order must have a valid Order Due Date
- You must have a workflow assigned to the line item
Whether or not the criteria above have been met, you can still open and view a Job Card, but you will not be able to schedule the job.
Job Card Overview
- Line item name and number. QTY includes total QTY for grouped line items.
- Assign Work Flow to the line items. Use the grouping option to add similar line items to the job.
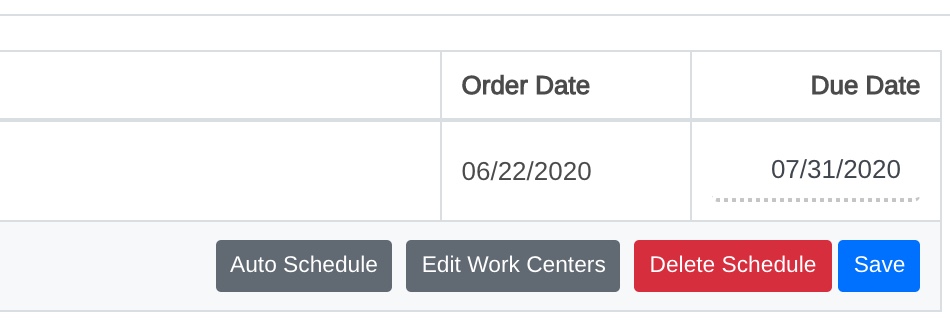
- Auto-Schedule your jobs or delete to reset the current job schedule.
- Displays the Work Center status within the workflow.
- Display start time and end time, along with time spent in the work center.
- Work Center job controls.
Auto Scheduling
In the Job Card, you can auto-schedule jobs. Using the parameters defined in the work center setup, Mothernode will schedule jobs at the first available time for each work center, working back from the Order Due Date. Users can also override or manually schedule jobs by reassigning a date manually or dragging and dropping a job on the calendar.
1. Click the Auto-Schedule Button to schedule the job.
2. Set the start date for the job to be scheduled. This date is the day the first work center should begin the job.
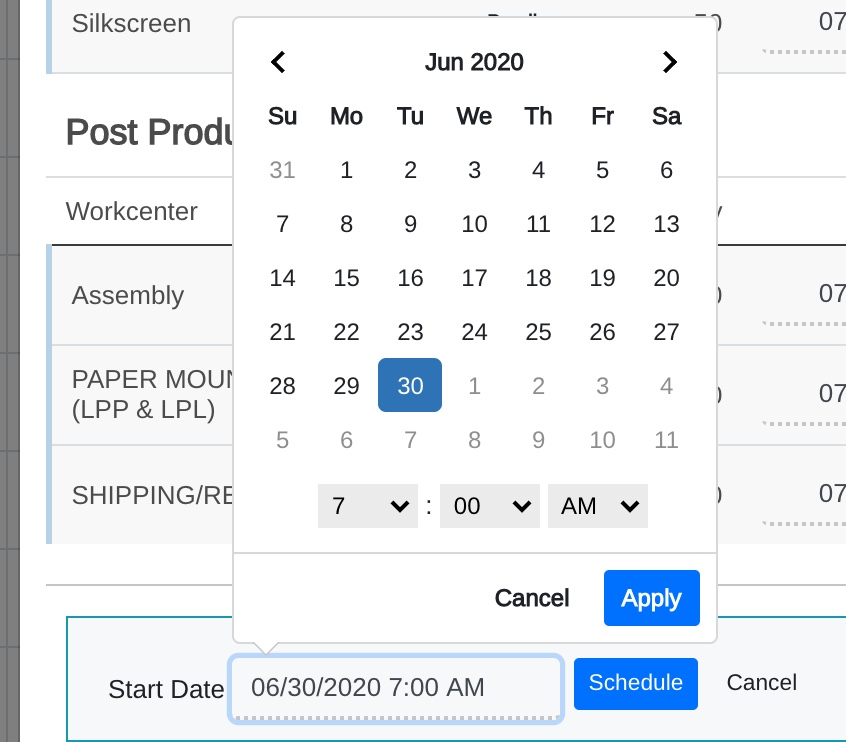
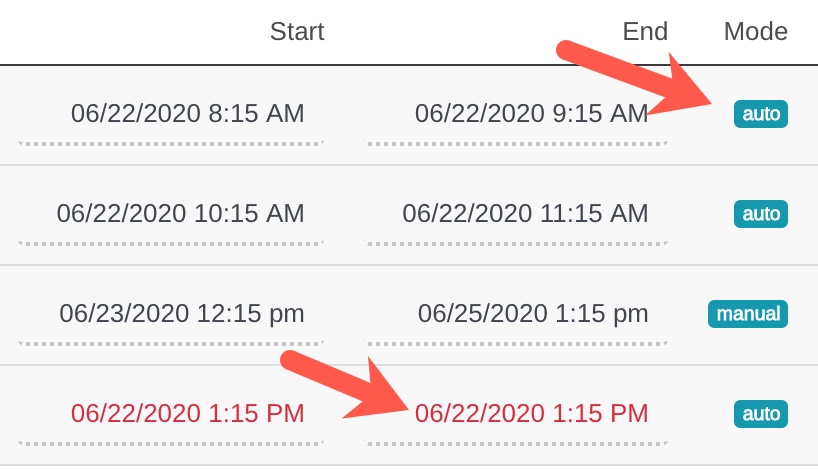
Start and stop dates are displayed within the work center list. The Mode indicates how the job was scheduled, including if it was scheduled by Mothernode (Auto), or if it was manually scheduled by a user (Manual). If a job has passed its expected completion date the scheduled date will appear in red.
Deleting Schedules
If you need to delete a schedule and start all over click the Delete Schedule button, and confirm your decision by clicking Delete Schedule within the confirmation window. This process will reset all the work centers.
Important: Deleting a schedule is a permanent action and cannot be reversed.

Starting and Stopping Jobs
When managing a Work Center, users can start, stop, skip, and complete.
- Start (Initiates the start time and starts the clock for the work center)
- Stop (Stops the timer for the job, and calculates the job time (Stop time – Start time) to display the duration)
- Skip (Skips the work center for the workflow)
- Complete (Marks the work center as complete)
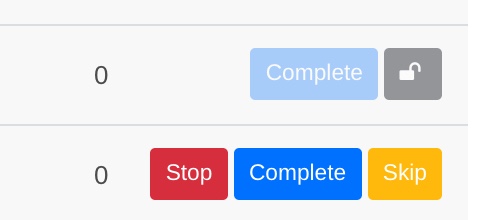
Once you complete a job, the buttons become disabled. If you need to re-access the buttons and their functions, click the Unlock button. You can manually update the dates and times at any point in the process.
IMPORTANT: For job tracking accuracy, users should start and stop jobs in Mothernode when they actually start or complete the job within the workflow. If this isn’t possible always try to notate the times and make the adjustments later.
