
Custom reports can be made from any Mothernode module. These reports are built by the user and can be saved and shared with other Mothernode users. Accessing and building custom reports are performed in the same manner in every module. In the instructions below, we will create a custom report within the Customer module.
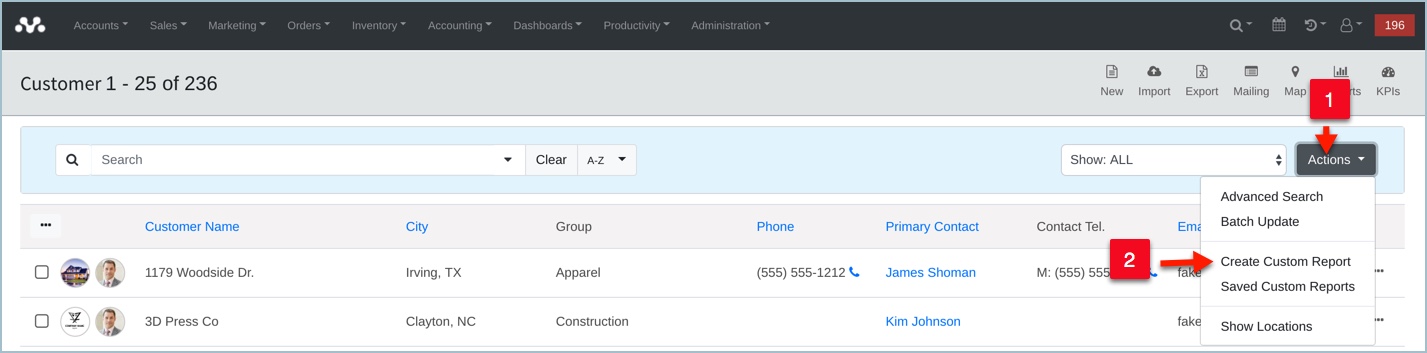
From the module of your choice, go to the Advanced Options dropdown and select the Create Custom Report option.
In Step 1, enter the name of your report in the Report Name field. A detailed description can be entered within the Report Description field. Check the Make Report Public checkbox to share your report with other Mothernode users.

In the Step 2, select the data fields you want to appear in your report. The Available Fields window is on the left, the Chosen Fields window is on the right. Any fields placed in the Chosen Fields window will be reflected in your report.
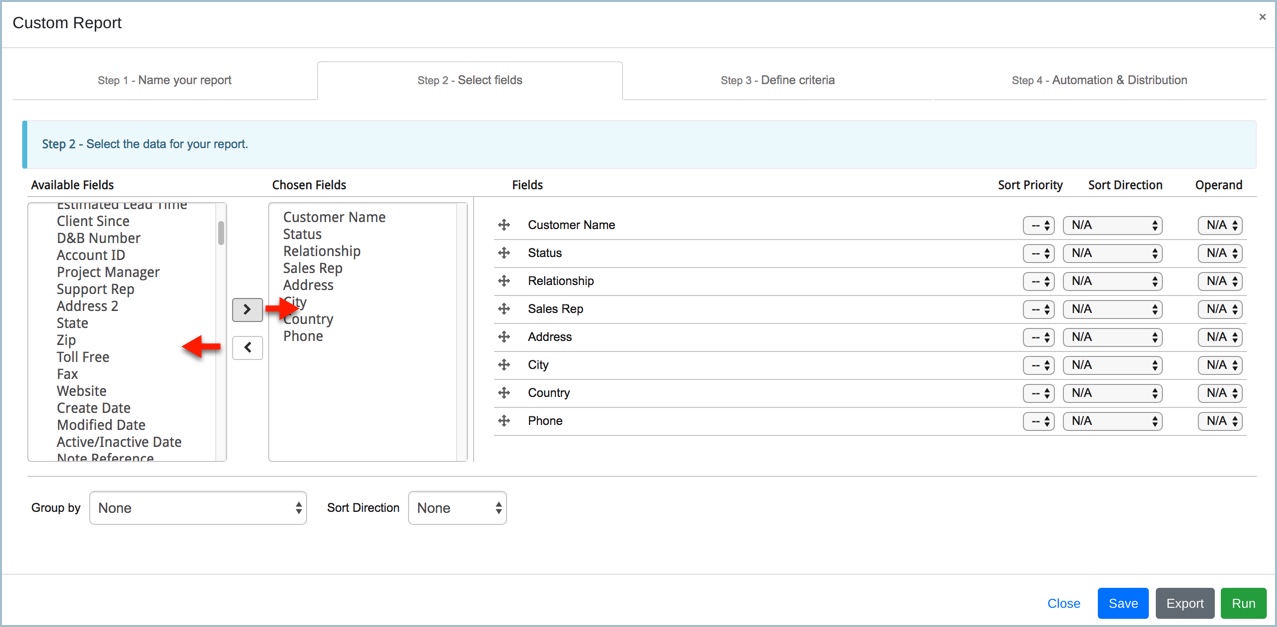
Additional options in Step 2 include the Group by and Sort Direction rules. These fields are optional and may be skipped if no sorting rules are required.

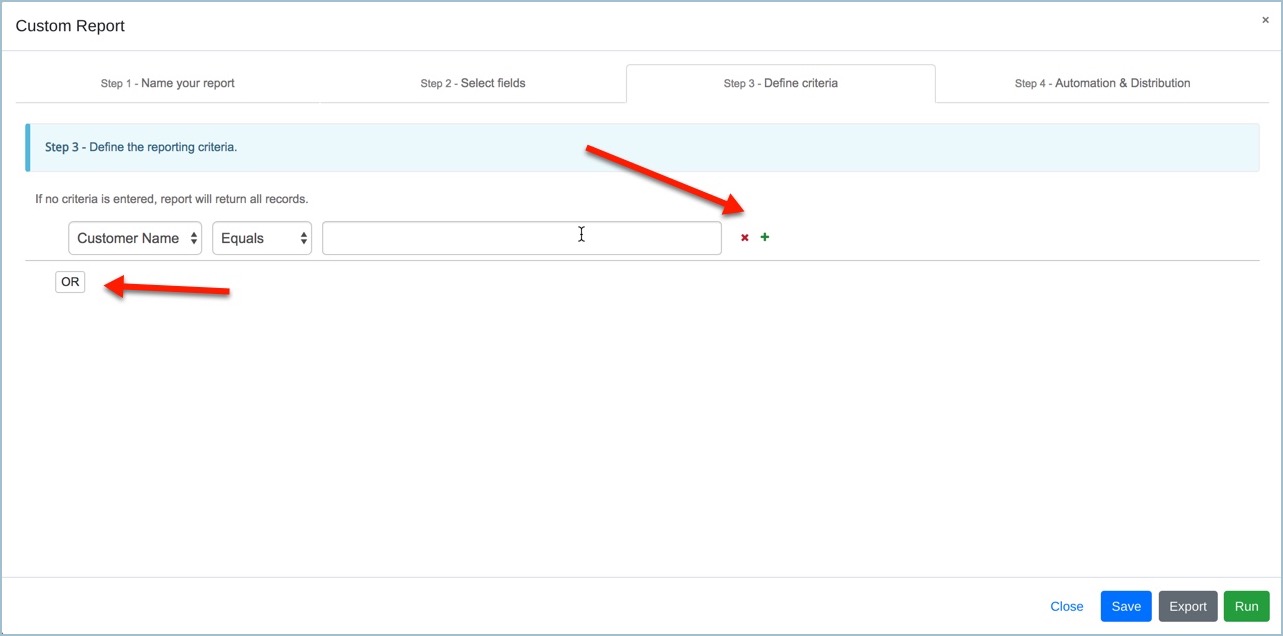
In Step 3, define the reporting criteria. You can include one or multiple criteria options. Clicking the green plus icon will provide you with an additional ‘AND’ options. Clicking the ‘OR’ button will provide you with a new search criteria, separate from the first one established.
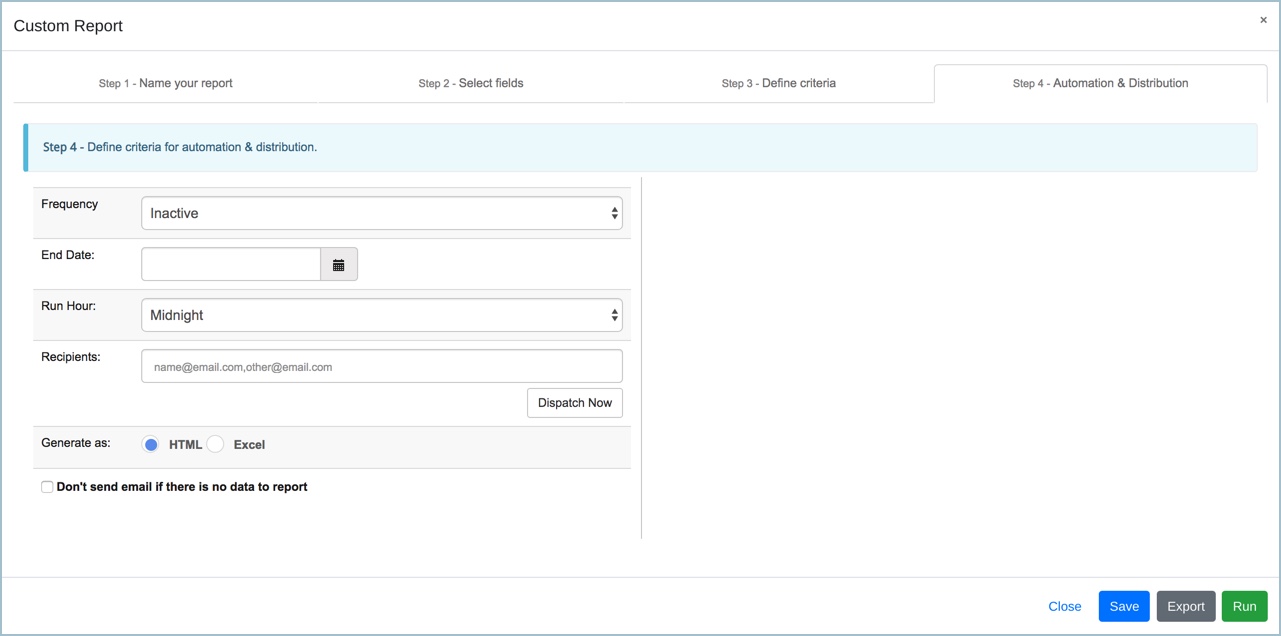
In Step 4, additional options are available for automation. These steps can be skipped if automation isn’t needed. Set the Frequency, End Date, Run Hour, and Recipients field. The Generate as option will dictate the format of the report. If you do not wish for the report to run if the data is null, place a checkmark in the final box shown in the image below.
Click the Run, Export, or Save button to finalize the report.
Watch the Video
For a complete review on how to create custom reports in Mothernode CRM watch this tutorial
