
Mothernode CRM allows users to install website visitor tracking code on their websites, landing pages, blogs and more. The tracking code is used to log visitor activity and notify users when their contacts, customers and prospects are visiting any of their web pages. Detailed statistics are captured and available in the contact record as well as the visitor tracking module.
Installing the website visitor tracking code is quick and simple. The following video demonstrates how the process can be completed with 2-3 minutes. You can watch the tutorial or follow the instructions provided on this page.
Installing the code
In order to install the code, users must have access to their website’s backend. This code can be installed on any site. If a third-party manages your website, be sure to send them this information. You must be using a CRM edition that includes the marketing module to get access to your CRM’s tracking code.
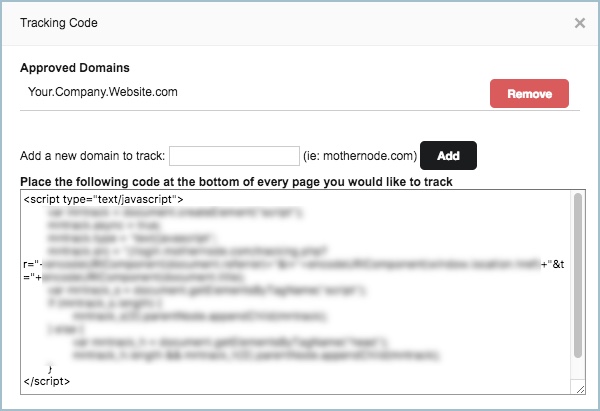
Getting the code
- Click Marketing in the tab
- Click Visitor Tracking in the menu
- In the Visitor Tracking Screen click Get Tracking Code (top right)
- In the light window, add the domain names for the website you want to track, ie: yourcompany.com (you can add as many domains as you want)
- Copy the code on this screen (you will be pasting it into your website)
Applying the Code
Access the backend of your website. The following instructions are for WordPress sites. This code can be applied to any website. See your website administrator for details.
Applying the code to your entire site:
- Install a Tracking Code plugin
- Activate the plugin
- Access the plugin module
- Paste your Mothernode Tracking Code into the plugin and Save
Applying the code to a single page
- Access the page you want to add the code to
- Using Visual Composer, add a Javascript Element
- Paste the tracking code in the Element and click Save
