
Connect your UPS (United Parcel Service) account to your Mothernode Account and streamline your order shipments with ease. Simplify your workflow and synchronize your shipping operations seamlessly.
Please note that the instructions provided in this knowledge base article are subject to change due to third-party updates or modifications. While we strive to ensure the accuracy and relevancy of the information provided, we cannot guarantee that it will always reflect the latest changes from third-party sources. Therefore, it is advisable to verify any instructions or procedures with the relevant third-party documentation or official sources before implementation. We appreciate your understanding and cooperation in this matter.
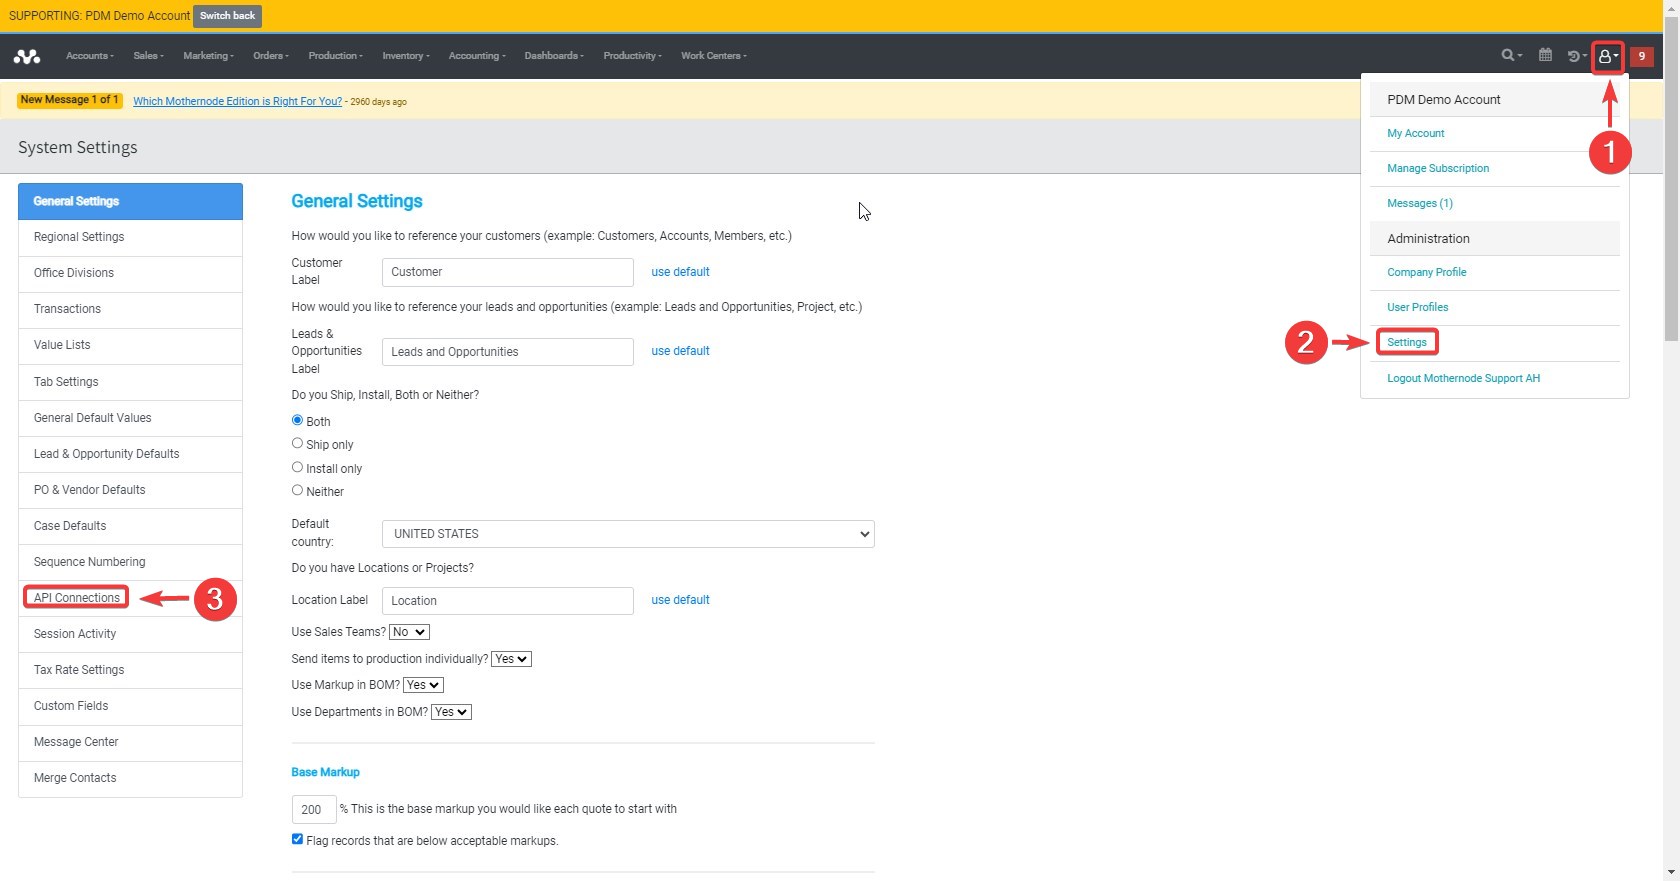
1. Accessing API Connection Settings
- Begin by logging in to your Mothernode account.
- Navigate to the Administration section.
- Select “Settings” followed by “API Connection.”
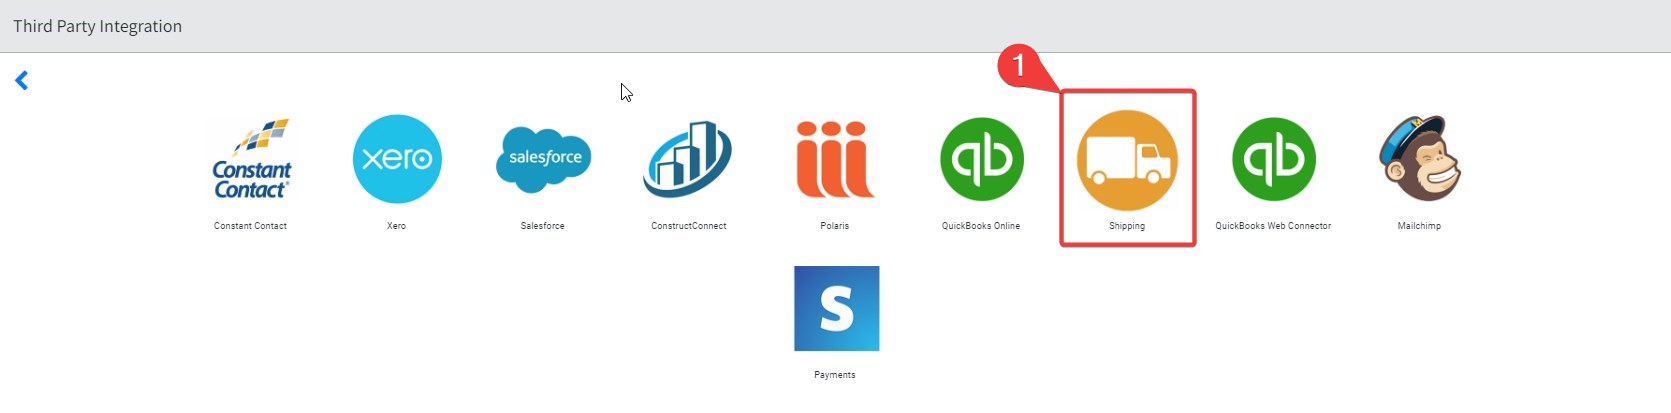
- Within the API Connection screen, locate and click on the “Shipping” option.
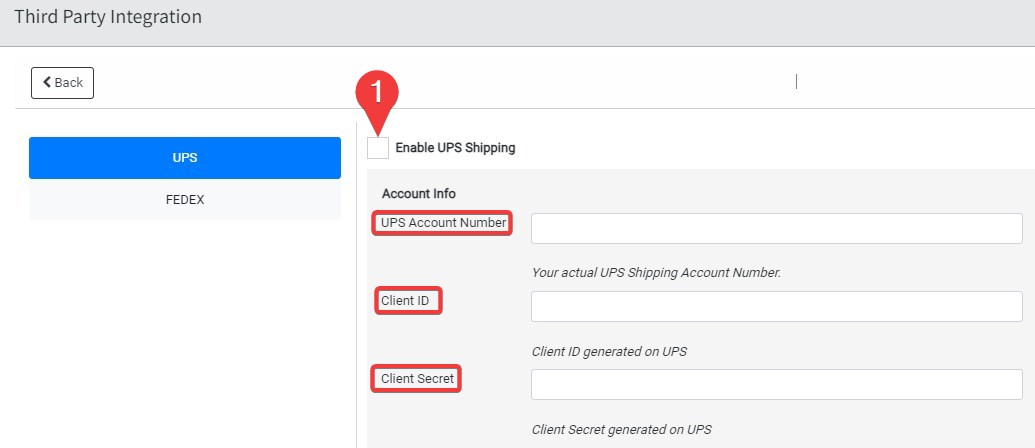
 2. Entering UPS Credentials:
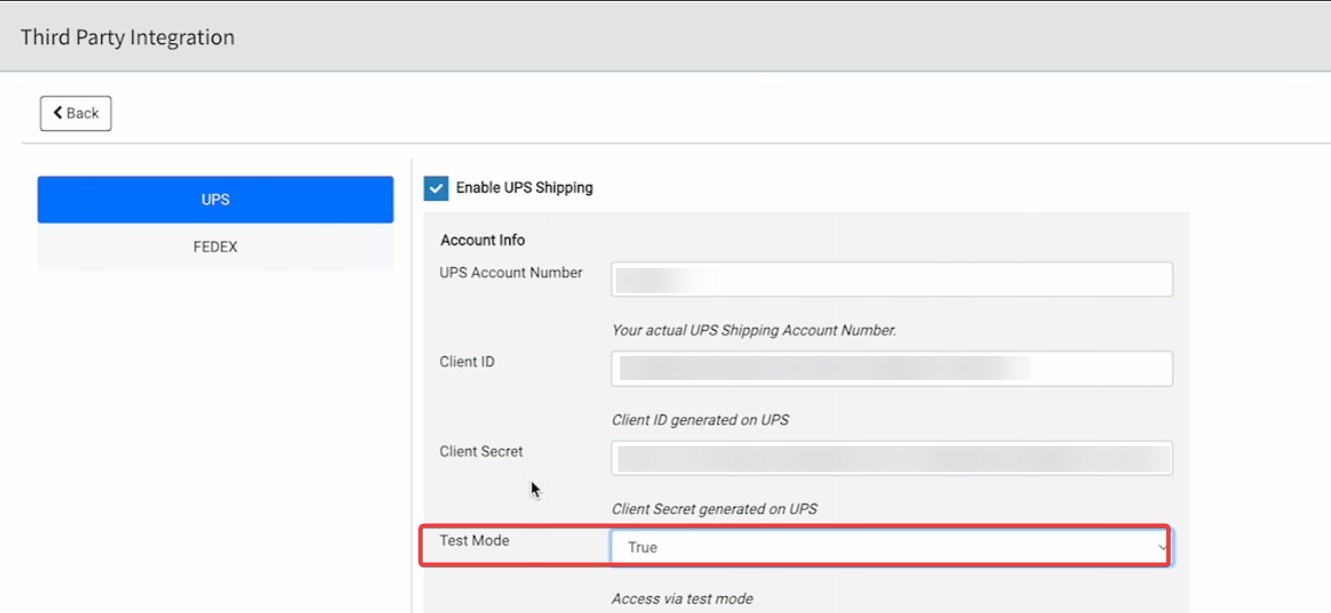
- Check the box to Enable UPS Shipping.
- Provide the following UPS credentials:
- UPS Account Number: Your actual UPS Shipping Account Number.
- Client ID: Client ID generated on UPS Developer Platform.
- Client Secret: Client Secret generated on UPS Developer Platform.
- Save
3.Obtaining UPS Credentials:
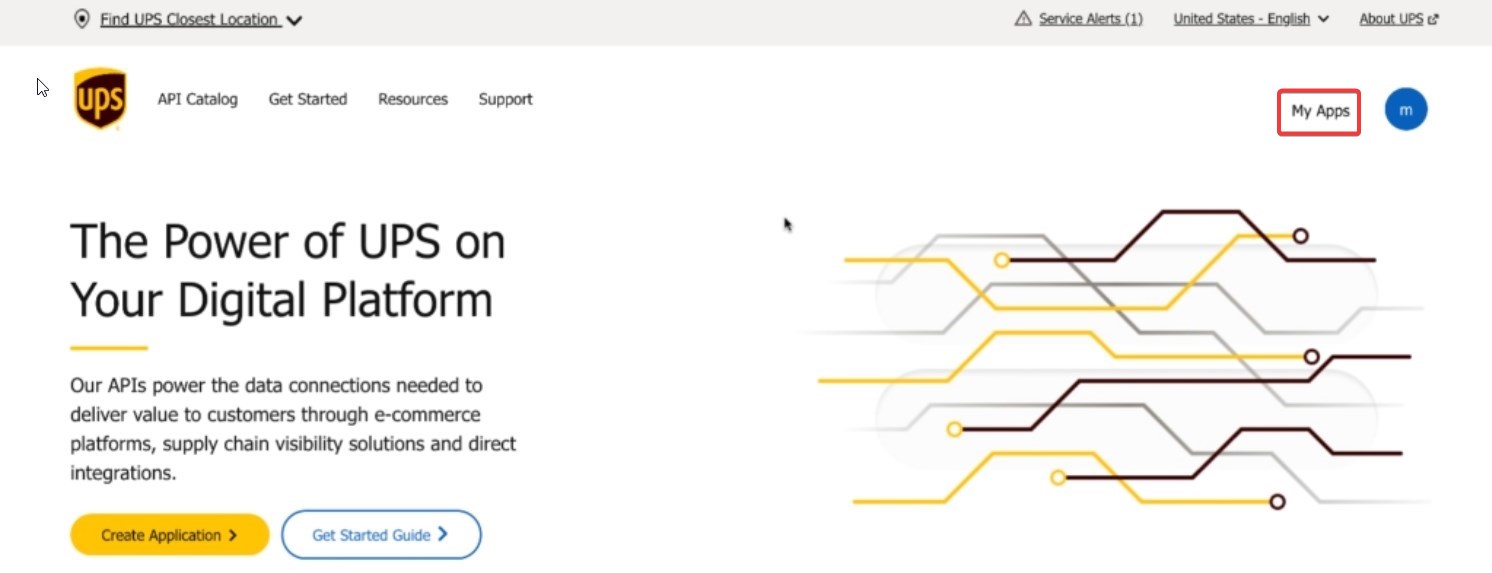
- To acquire your UPS Account Number, Client ID, and Client Secret, start by creating a developer account through UPS at UPS Developer Platform. UPS Developer Portal
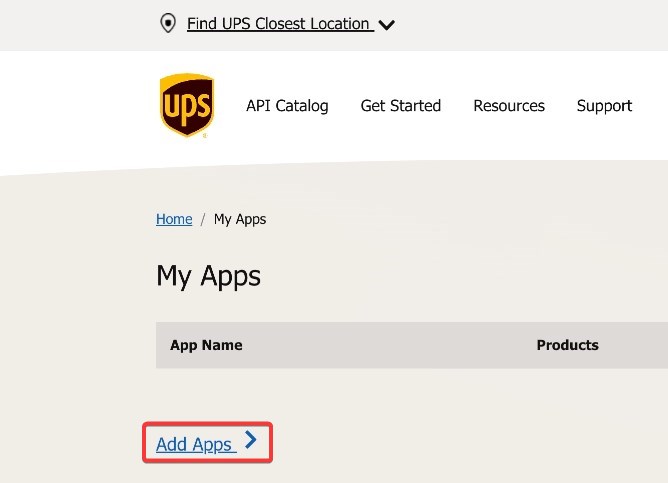
4. Creating UPS App:
- After successfully creating your developer account with UPS, navigate to “My Apps” and select “Add Apps.”
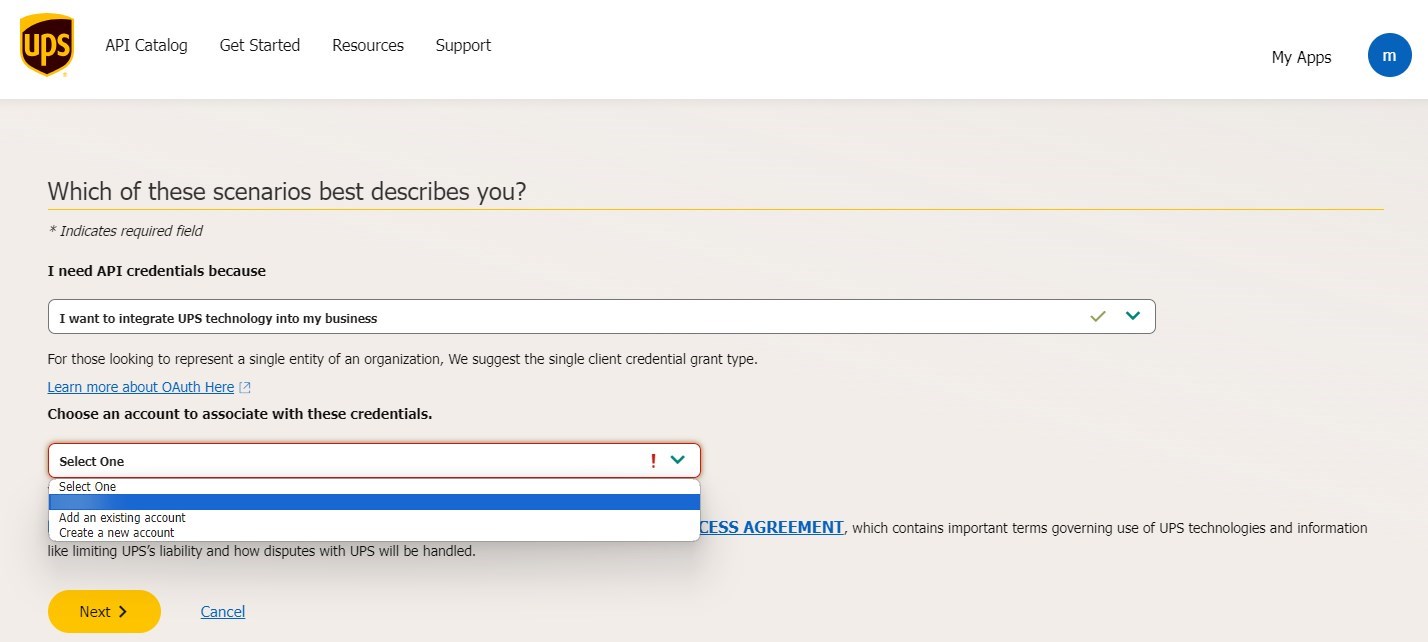
- Choose the option “I need API credentials because: I want to integrate UPS technology into my business.“
- Select an account to associate with these credentials (either pick an available account, add an existing account, or create a new account).
- For adding an existing account or creating a new account, follow the steps provided by UPS.
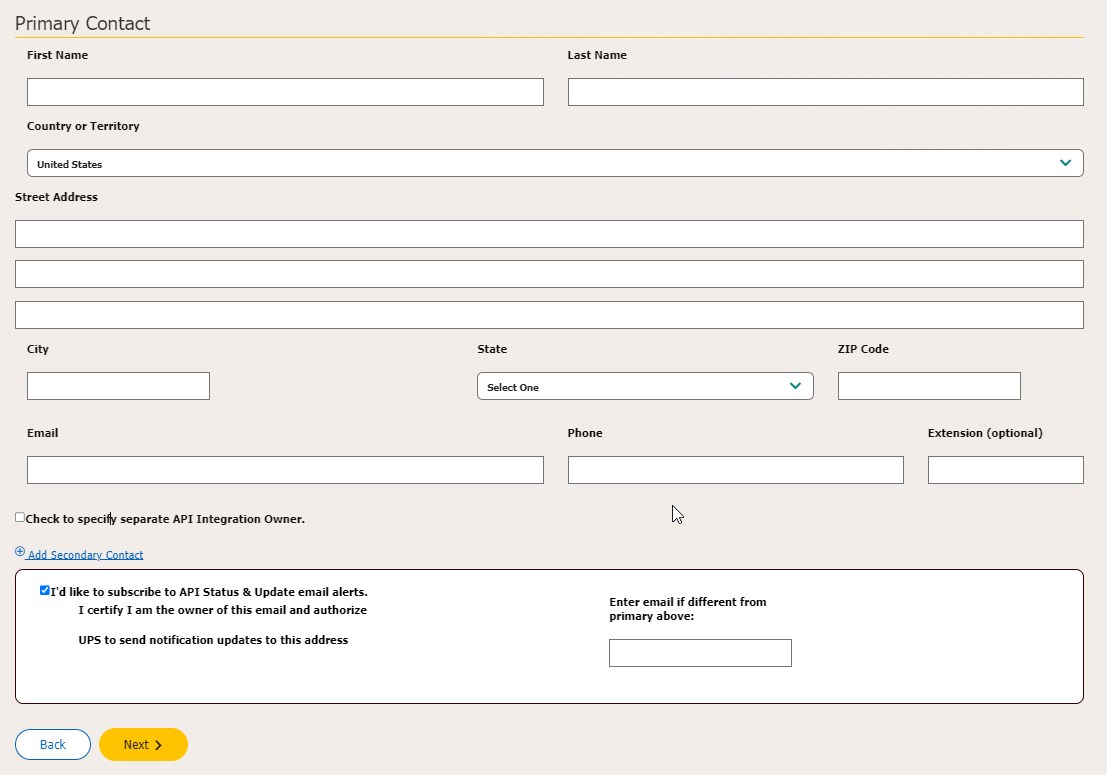
- To select an available account, add Primary Contact and click Next.
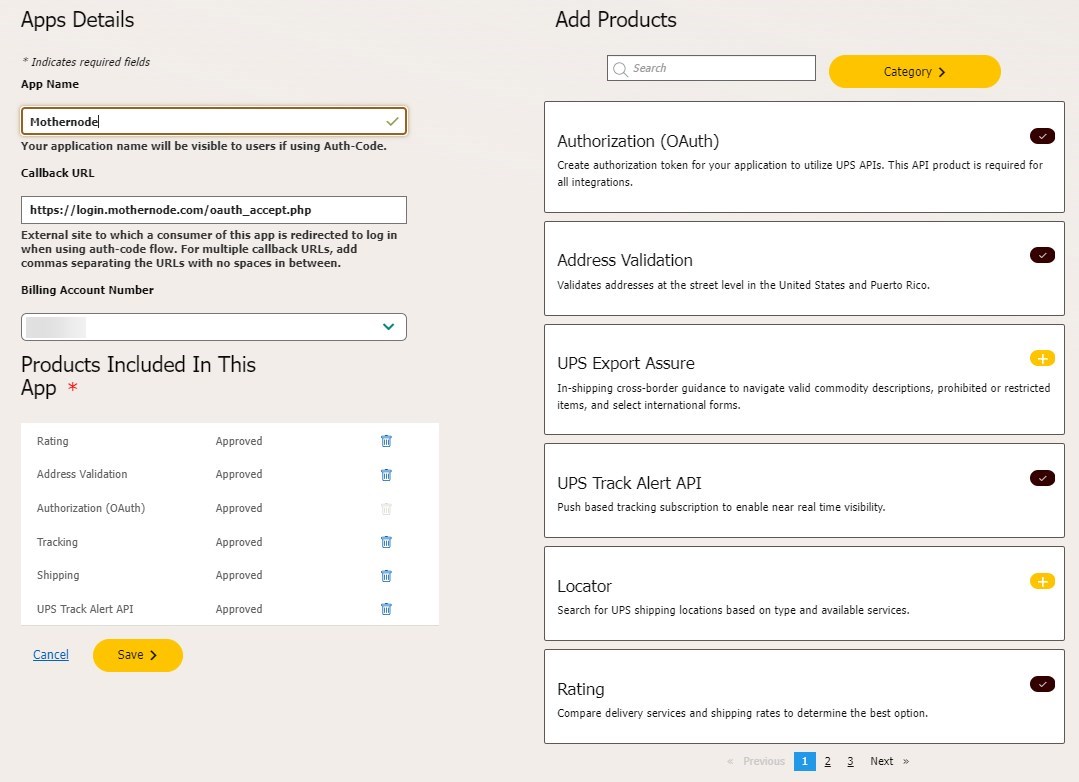
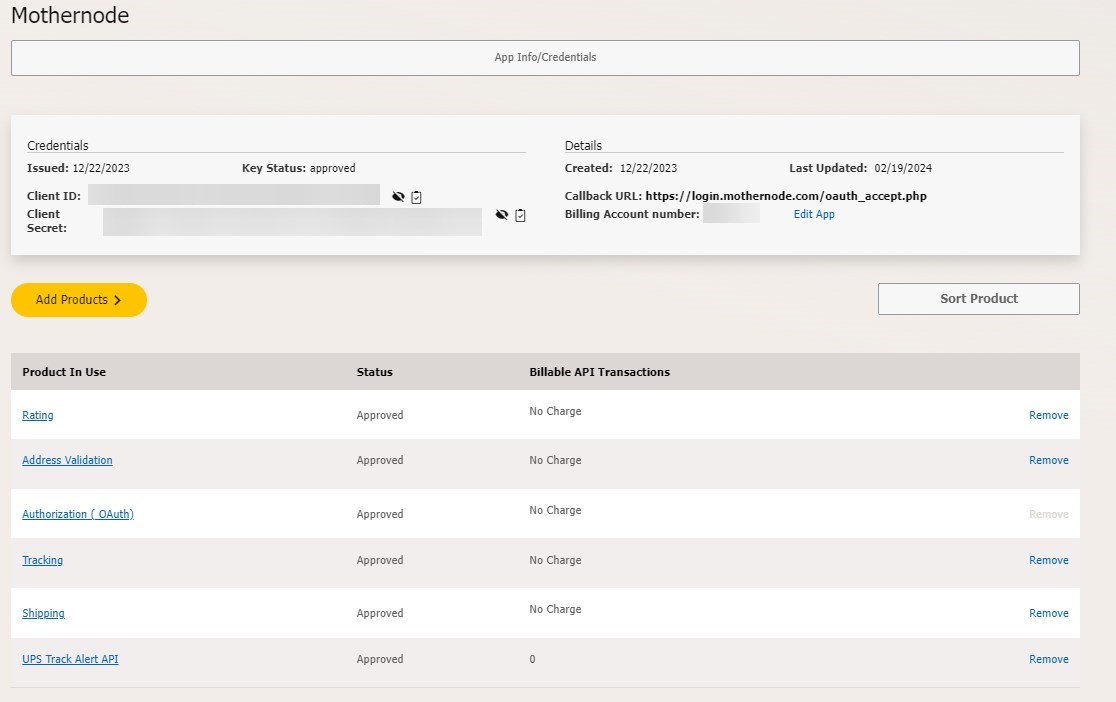
5. Adding App Details:
Provide the following details for the app:
- App Name: Mothernode
- Callback URL: https://login.mothernode.com/oauth_accept.php
- Add Products: Authorization (OAuth), Address Validation, UPS Track Alert API, Rating, Tracking, Shipping.
- Save.
6. Testing API Credentials:
- Once the app is created, verify the API Credentials by selecting the “My App > Mothernode” link. Here, you will find your credentials for the Client ID, Client Secret, and Billing Account Number (UPS Account Number in Mothernode).
- Return to Mothernode’s Administration > Settings > API Connections > Shipping.
Choose UPS and Enable UPS Shipping. - Add UPS Account Number, Client ID, and Client Secret.
- Set Test Mode to True for testing purposes.
- Save the settings.
 7. Processing Orders with UPS Integration:
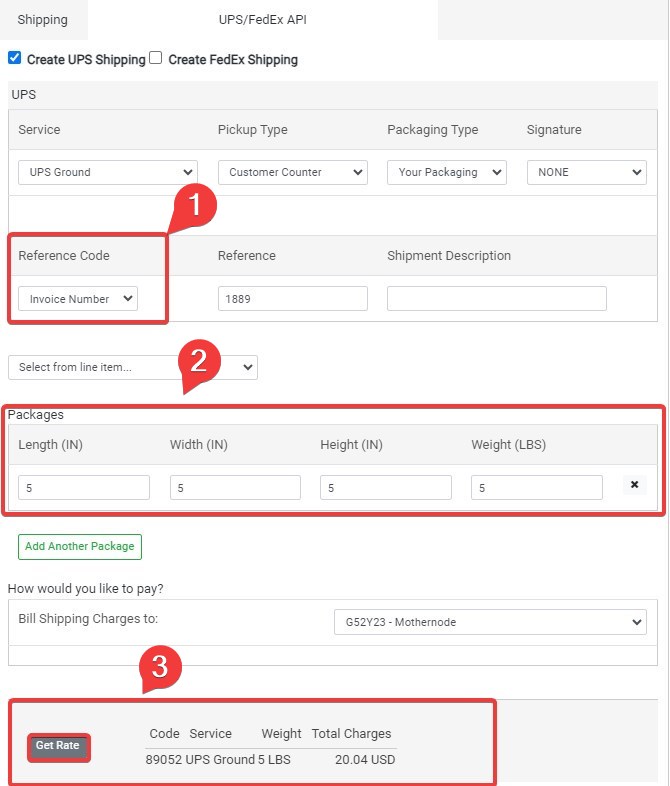
- To process an order with UPS integration, navigate to the desired order in Mothernode.
- Add a dummy line item with a quantity (e.g., 25).
- Navigate to the Ship/Install tab and add Ship 1.
- Process Shipment using UPS/FedEx API.
- Provide necessary details such as Reference Code, Length, Width, Height, Weight.
- Obtain rate information by selecting “Get Rate.”
8. Disable training mode:
- Navigate to the Administration section.
- Select “Settings” followed by “API Connection.”
- Within the API Connection screen, locate and click on the “Shipping” option.
- Set Test Mode to False.
- Save the settings.
By following these steps, you can seamlessly integrate UPS services into your Mothernode account, facilitating efficient shipping management and order processing. If you encounter any difficulties during the integration process, refer to the provided instructions or contact Mothernode support for assistance.
