
Before You Begin
Before you begin this very visual and user-friendly process, please note that preparing your leads and opportunities data prior to importing is critical to the speed and success of the import itself. We recommend reading Preparing your Leads and Opportunities Import prior to following the steps below to perform the actual import.
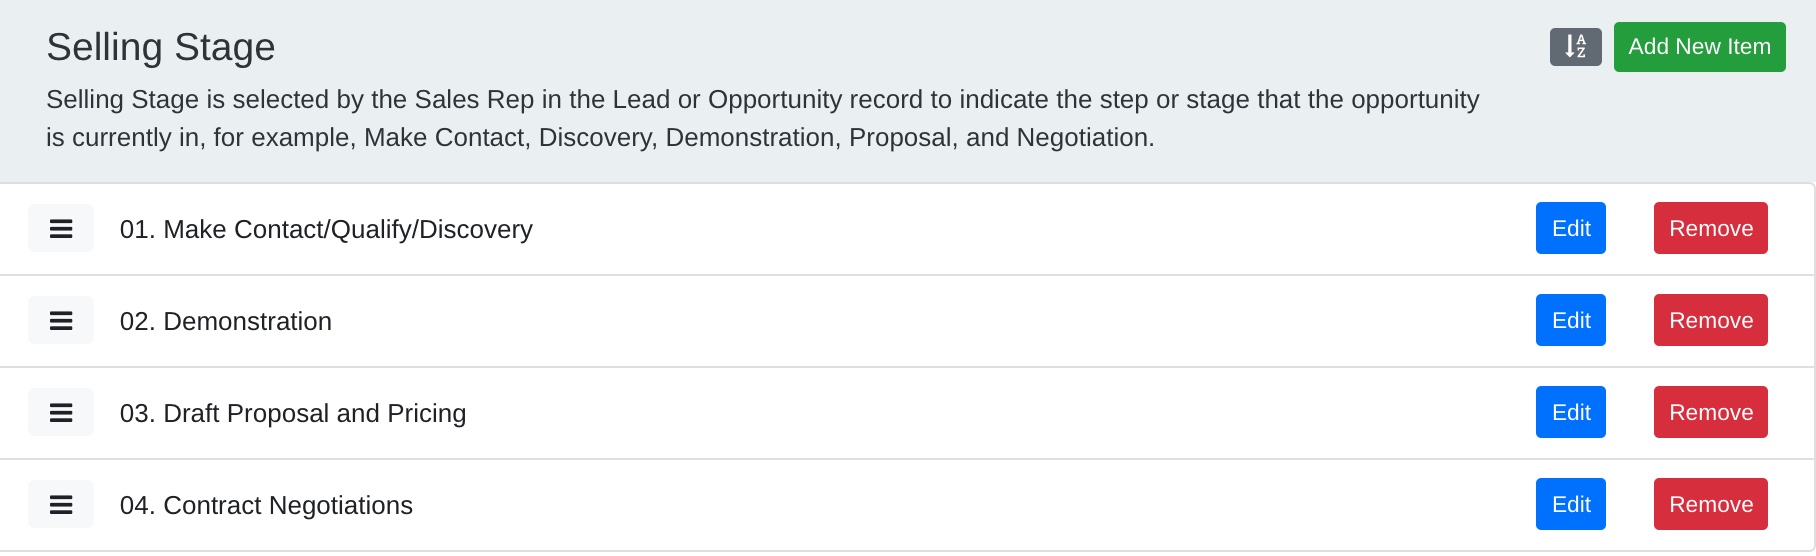
Additionally, it is recommended to review the defined Selling Stages in Mothernode CRM against the Selling Stages that your business uses, and modify the Mothernode CRM Selling Stages accordingly before you begin the import process:
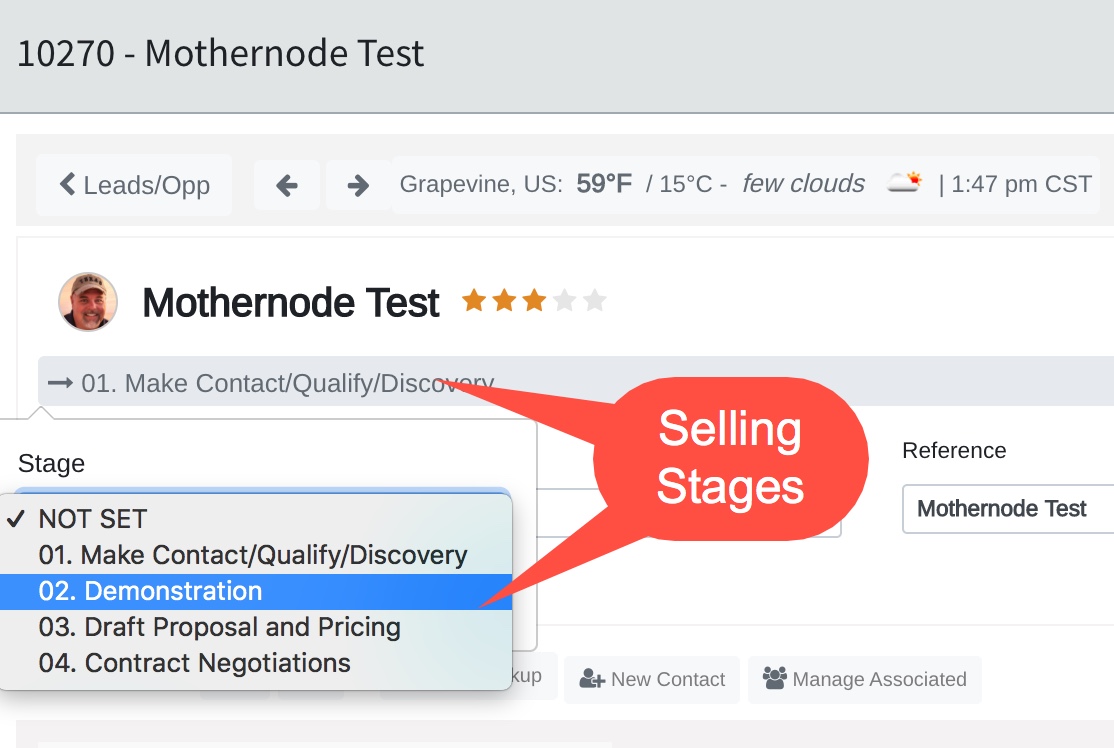
Access your Value List settings under Administration to modify or re-number the Selling Stages that will be used within Leads and Opportunities:
Step 1: Choose Data File to Import
The Import option in the upper-right portion of the Leads and Opportunities module takes you to Step 1 of a four-part process to import your Leads and Opportunities into Mothernode CRM:
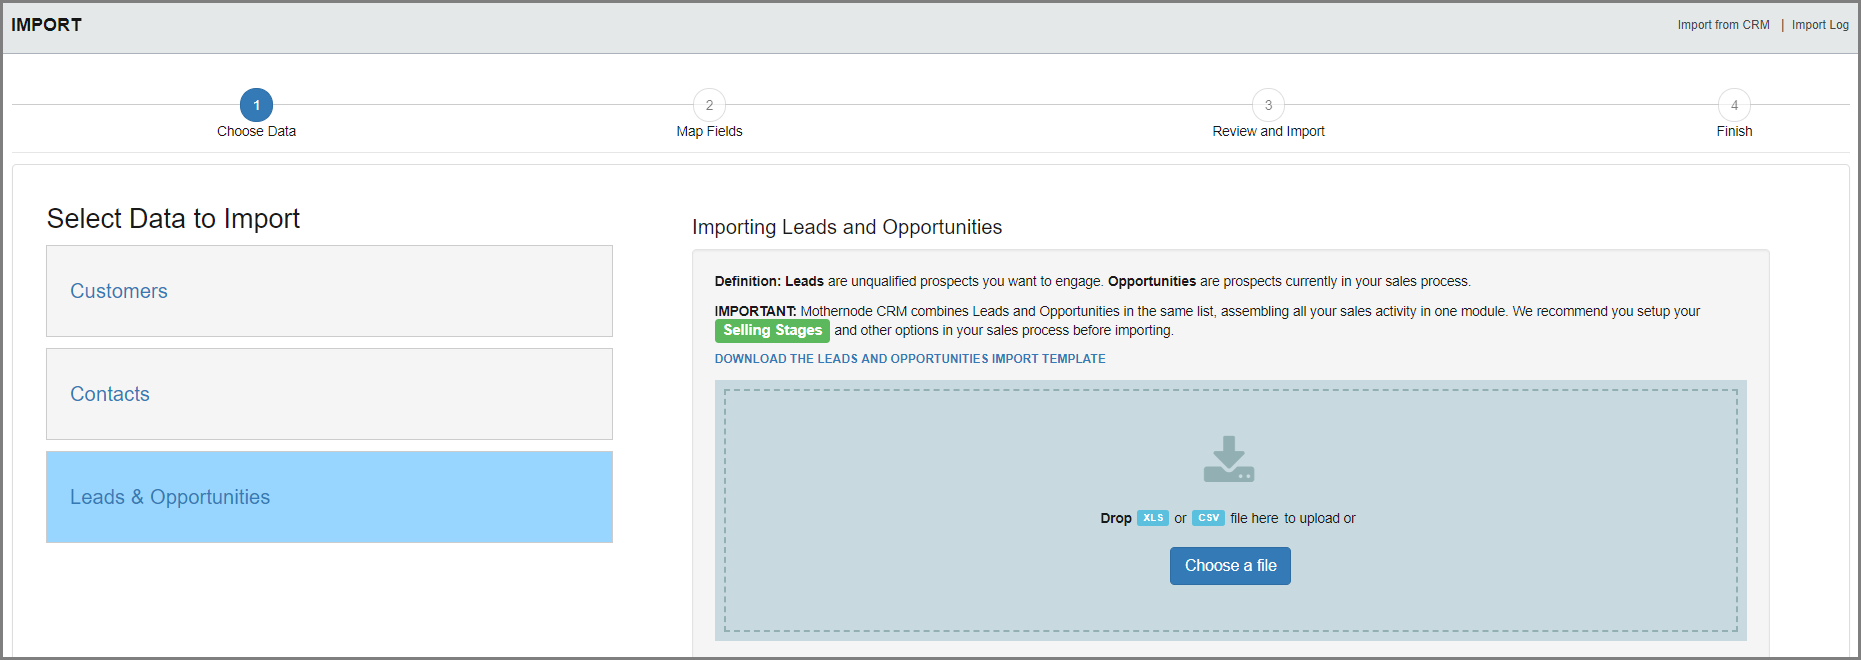
Although you may import your own .xls or .csv file with your lead/opportunity data, it is recommended to use the Mothernode Leads and Opportunities Import Template to ensure a faster and thorough import of your data:
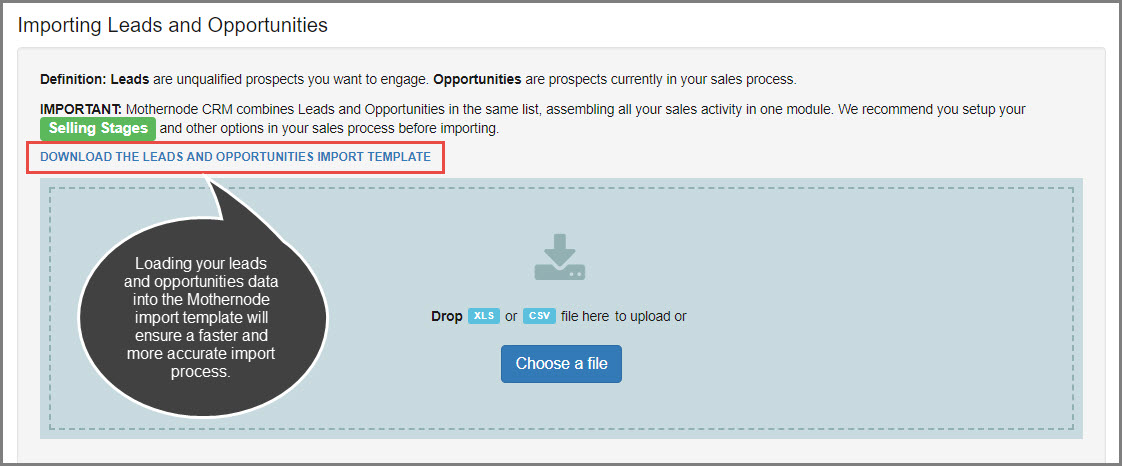
Click the download link on the Choose Data screen or click here for the Mothernode Import Template.
Once you have loaded your data into the template, save the file and click Choose a File or drag-and-drop the file into the shaded area to upload the data.
Step 2: Map Field Labels
Once the leads/opportunities data file is uploaded, it’s important to ensure that the field labels in your import file (see row below labeled Source) match the Mothernode Leads and Opportunities field labels (see row labeled Target).
Click Detect Fields to confirm Target fields that are properly mapped (shaded blue), and fields that require manual mapping (shaded white). For those requiring manual mapping, click the Select dropdown to identify and select the field label that matches your source field label. The Target field label should now be shaded blue to confirm mapping:
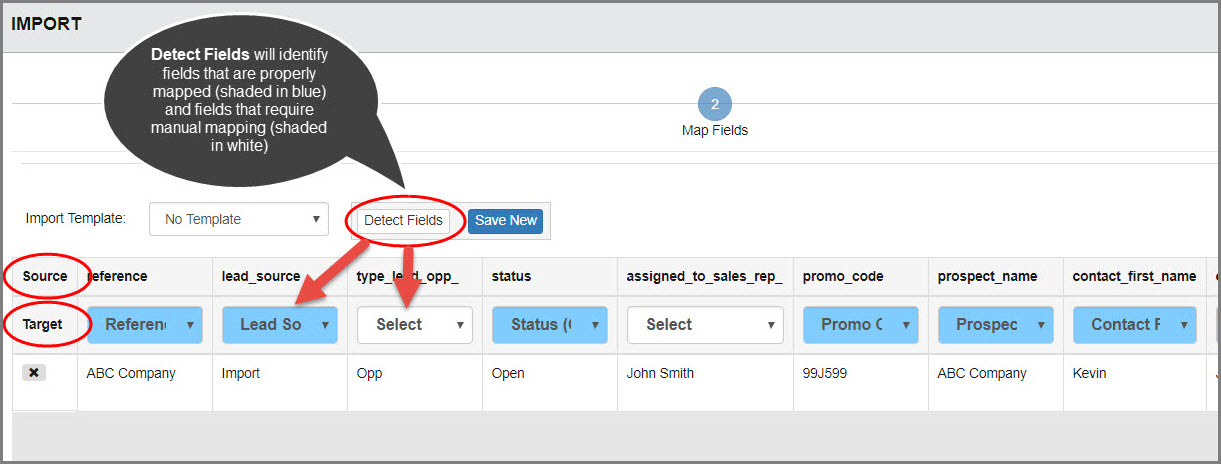
The Save New button to the right of Detect Fields allows you to save your import file as a template with the updated field labels, so you can re-use the template for future imports without having to manually map source and target fields.
After confirming the mapping of source and target fields, click Review and Import in the lower right to perform a final review and complete the leads and opportunities data import.
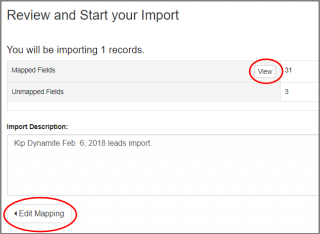
Step 3: Review and Complete Import
The Review and Import screen will confirm that all fields are mapped, or provide the number of fields that remain unmapped. Click the View button to see a summary of the mapped fields, and if any additional mapping needs to be performed, click Edit Mapping to return to the prior step and make the needed updates.
Click Start Import in the lower-right portion of the screen to complete the import process.
Step 4: Import Confirmation
The Finished message confirms that the import is complete, and includes three final options:

View Import Log provides a list of recent imports, with the option to Delete an import if it needs to be re-done for any reason.
* Please note that any of the Mothernode CRM Import functions include an Import Log link in the upper-right portion of the screen to view imports and if necessary delete an import, and may also be accessed through the Productivity menu. Please see Undoing Imports for more information.
View Records provides a view of the newly imported records as they now appear in the Mothernode CRM Leads and Opportunities module.
Import Another File allows you to easily begin the process again if you have a new file to import.
Video Tutorial
For more information, please view our video tutorial Importing Leads and Opportunities in Mothernode CRM.
