
This is the second in a series of articles dedicated to the creation and implementation of Lead Capture Forms in Mothernode CRM. The following links enable you to access all articles in this series:
- Lead Capture Forms – Introduction
- Lead Capture Forms – Settings
- Lead Capture Forms – Styling
- Lead Capture Forms – Fields
- Lead Capture Forms – Confirmation OptionsT
- Lead Capture Forms – Mailchimp Lists
- Lead Capture Forms – Mothernode Sequences
- Lead Capture Forms – Form Code
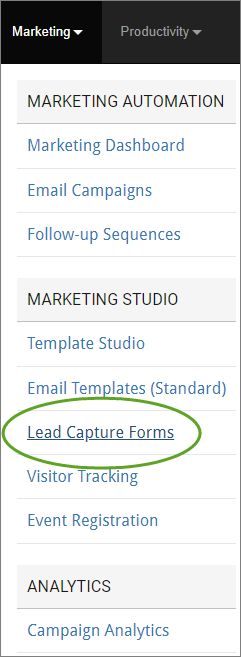
The starting point for developing a lead capture form is the Mothernode CRM Marketing menu:
You can start setting-up a new web form by selecting New Web Form in the upper-right, and type a form name and description. You can also duplicate an existing form to start a new form with selections you can modify from the original form.
The four tabs in the Lead Capture Forms function represent the basic steps in this straightforward process. We’ll begin with Settings.
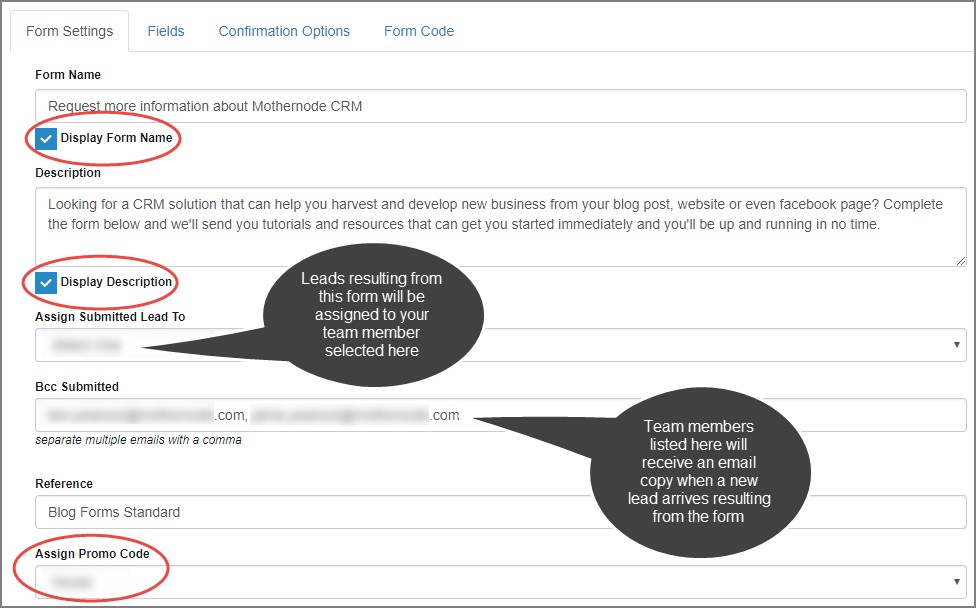
Form Name: Public title for your lead capture form. Checking the checkbox to the right of the form name will display the form name above the form on the page seen by the public.
Description: Use the description field to explain the use and purpose of the form to the person who will be completing the form. Again, you can choose to display this or maintain this as an internal note using the display option to the right.
Assign Submitted Leads To: Designate a lead recipient to receive any new inquiries resulting from this form.
Bcc Submitted: Automatically BCC form submissions to other team members who would like to receive email copies when a form is completed and submitted.
